Configure time settings for the time zone used in your organization. Check the date format and other such parameters. Set up/modify time information using time settings functionality. This functionality to set time is important as various activities (such as payroll, timesheet, leave, appraisal and other schedulers) are based on these settings. The steps mentioned below are of Empxtrack Enterprise product.
Note: Empxtrack allows selection of preferred time zone and date format at the time of application setup.
To configure time settings, you need to:
- Log into the system as HR Manager/ Administrator.
- Click on the Product configurations tab on the Homepage. Under General Settings section, click Time Settings link. The page appears as shown in Figure 1.
- Select the date format that you want to use from the Date Format dropdown.
- Select the start day of the week in your company according to your country from Week Starts On dropdown.
- Select the time zone of your country (where your office is located) from the Time Zone (Head Office) field.

Figure 1
- Configure the financial year by selecting Calendar year if you want to use the calendar year as financial year or selecting Other and then specifying the Start Date and Start Month of the financial year in their respective fields.
- Click View Financial Periods link to view/ set the current financial year. A window displaying a list of financial years already created in the system appears. The window allows you to add a new financial year or mark any of the existing financial year as current.
- Click Mark Current to mark the financial year as current financial year, as shown in Figure 2. The current financial year displays Yes contrary to other time periods that display a No.
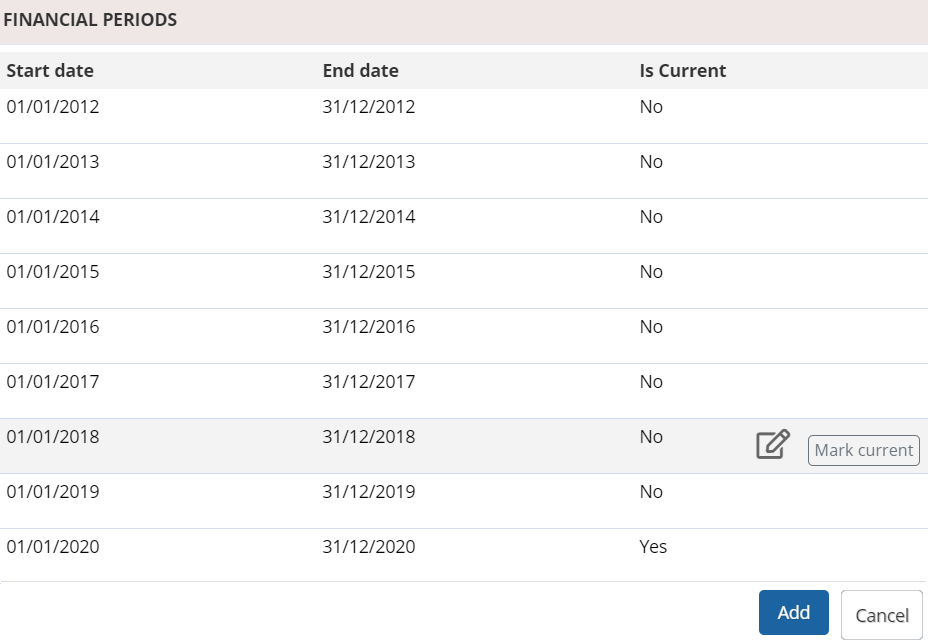
Figure 2
- Click Add to add a new financial year, as shown in Figure 3.
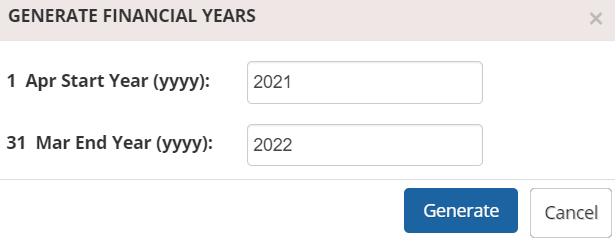
Figure 3
The new financial year is successfully created as shown in figure 4.
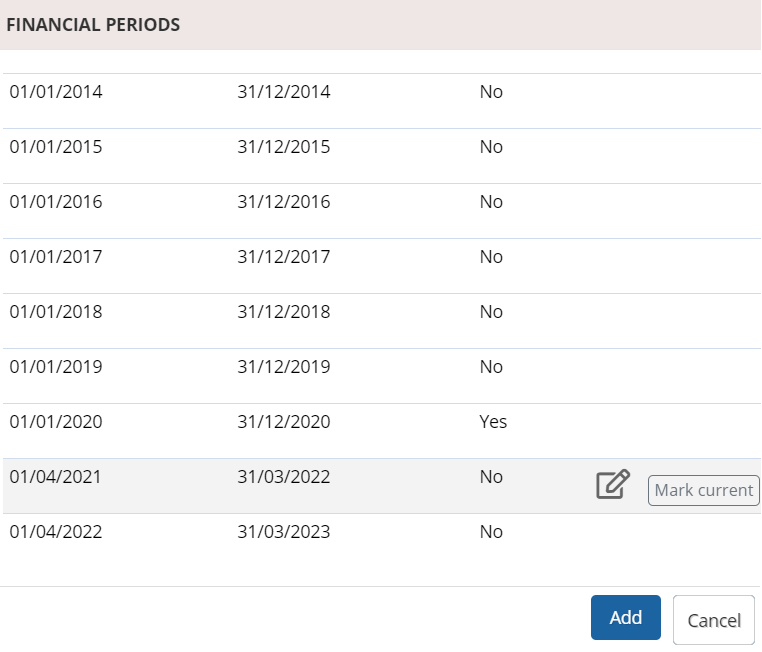
Figure 4
- Select the time period that you want to use in the application from Time Period field, as shown in Figure 5. The system provides you the flexibility of using three types of time periods, Calendar Year, Financial Year and Other. Usually the financial period is used for financial transactions and it does not necessarily start in January. In India, the financial period starts with 1st April.The time periods are also required by other modules such as Goal settings, Appraisal, and Training. These applications generally follow the calendar year. So for other applications you can set the Time Period.The flexibility of setting two time periods allows you to use different time periods for different modules.

Figure 5
To view the existing time periods in the system click View Time Periods link.
The time periods appear, as shown in Figure 6.
You can set one of the time periods as current time period by clicking on Mark Current. The system treats the default time period as current time period and uses it by default in all the modules.
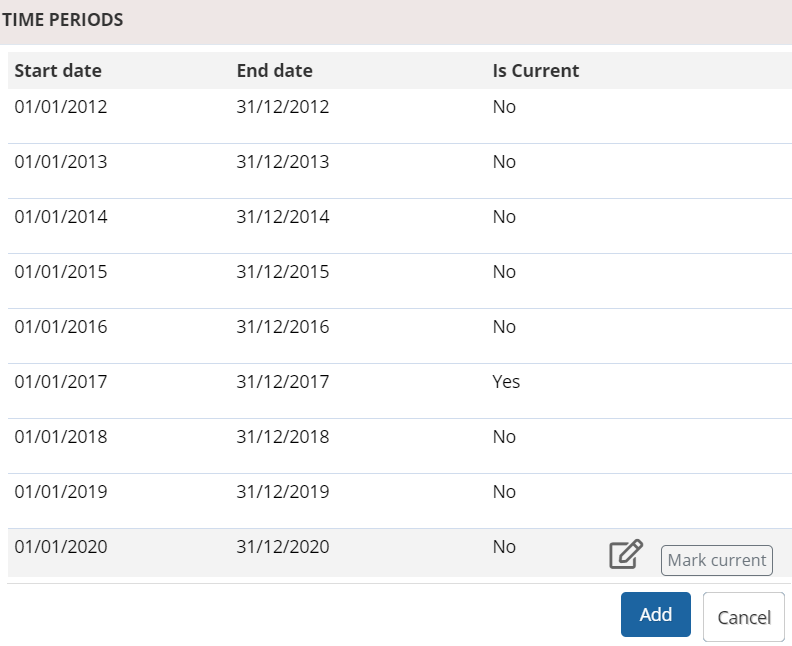
Figure 6
- Click Add to add a new time period. The Generate Time Periods window appears, as shown in Figure 7.
- Provide the start and end year in the Start Year and End Year fields and then click Generate.
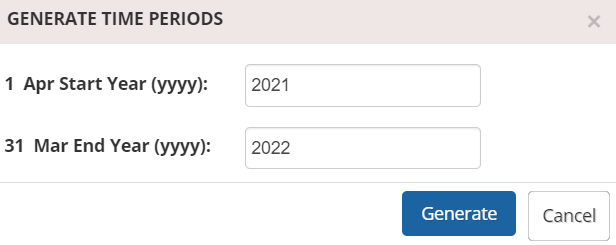
Figure 7
The time period is successfully generated.
- Select the time period that you want to use for Holiday/Leave Period field.
- Click Update. The time settings are successfully updated and a message suggesting the same appears, as shown in Figure 8.

Figure 8
Click on each of these links to know more about them:
- Setup Password Policy
- Send Password to Employees
- Forget Password
- Reset Password
- Setup, View and Edit Email Templates
- Navigation in Empxtrack
- Multiple Upgrade Options in Empxtrack
- Setup Global Groups
- Setup Access Controls
- Manage Workflows
- Setup Skills and Competencies
- Setup Company Information
- Upload Employee Data
- Upload Reporting Relationship Data
- Setup HR Admin
- Setup Roles
- Masquerade as another employee
- File Validation Utility
- Open CSV File
- Save CSV File
- Advanced Search


