Empxtrack provides pre-configured email templates and gives flexibility to setup, view and edit email templates. Availability of pre-configured email templates saves time and helps in standardization of employee communication. This help page demonstrates stepwise instructions to setup, view and edit email templates.
Watch the video on how to setup, view and edit email templates
To configure email templates, follow these steps:
- Login to the system as an HR manager/ HR admin.
- On the Homepage, click on the Product configurations tab.
- Under Setup masters, click on the Setup email templates link. A new page appears with pre-configured email templates, as shown in Figure 1. On this page, you can either add a new template or edit an existing one.
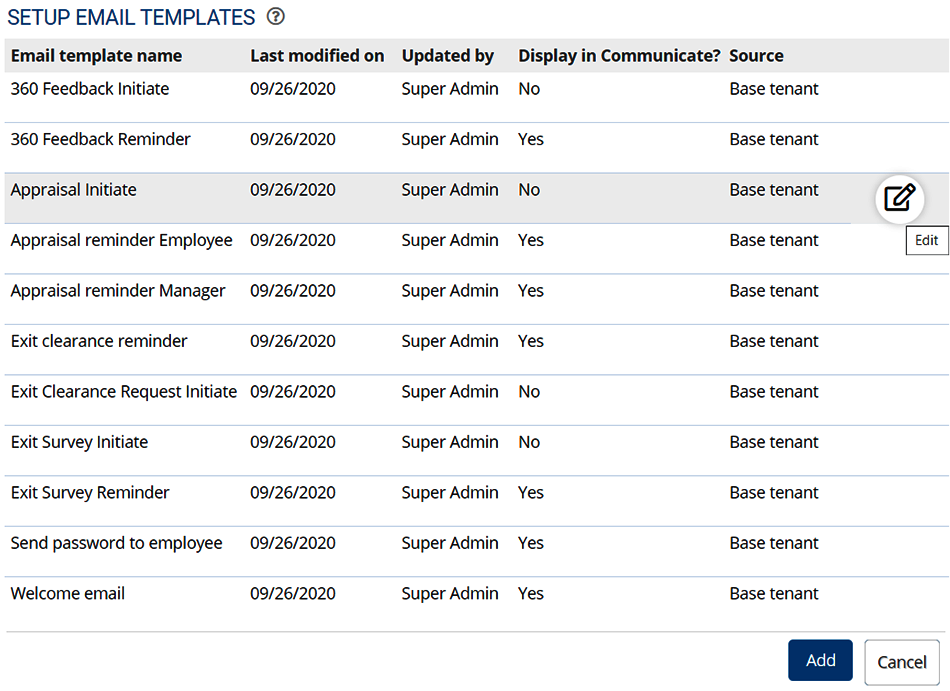
Figure 1
Add a New Template
- Click on the Add button to create a new email template. A new page appears where you can provide details of the new template, as shown in Figure 2.
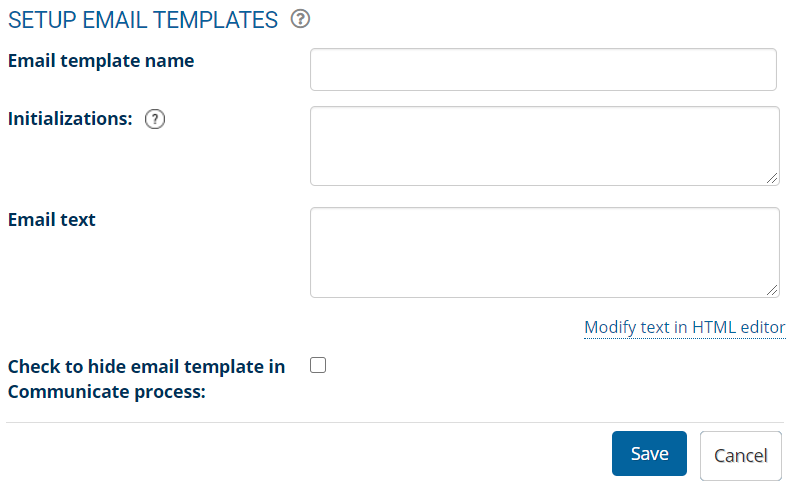
Figure 2
- Specify a unique name for the template in the Email template name textbox.
- Mention the Initializations which are used for setting up data elements. You can contact the Empxtrack support team to setup the appropriate element.
- Provide the content of the email in the Email text field. Once the text is added , click on the Modify text in HTML editor link to edit text or change its presentation. Click the Update button once changes are done.
- Select the checkbox corresponding to Check to hide email template in Communicate process, if you want to hide this email template in the employee communication process.
- Click Save. The new email template is successfully added in the system.
Edit Email Templates
- Click on the Edit icon corresponding to any template to modify the existing template (as shown in Figure 1).
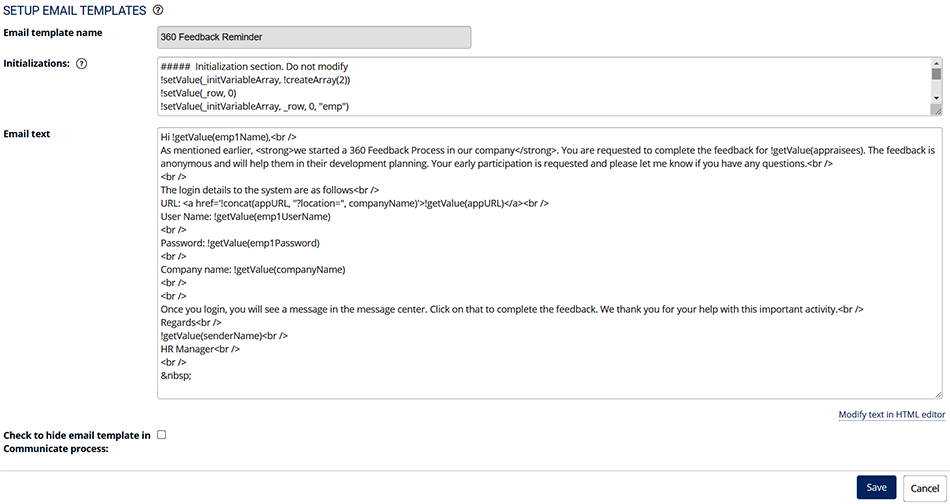
Figure 3
- Modify the existing details of the template as per your specific requirements. You can modify the Initializations and Email text as needed.
- Once all changes are done, click the Save button. The modifications are done successfully.
Employee Communication
Employee Communication is an important part of employee engagement activities in any organization. Save your time by using ready-to-use editable email and letter templates for employee communication.
To send a message to multiple employees, follow the steps:
- Login to the system as an HR manager/ HR admin.
- On the Homepage, click on the Product configurations tab.
- Under Employee management, click on the Employee communication link. A new page appears with multiple tabs as shown in Figure 4.
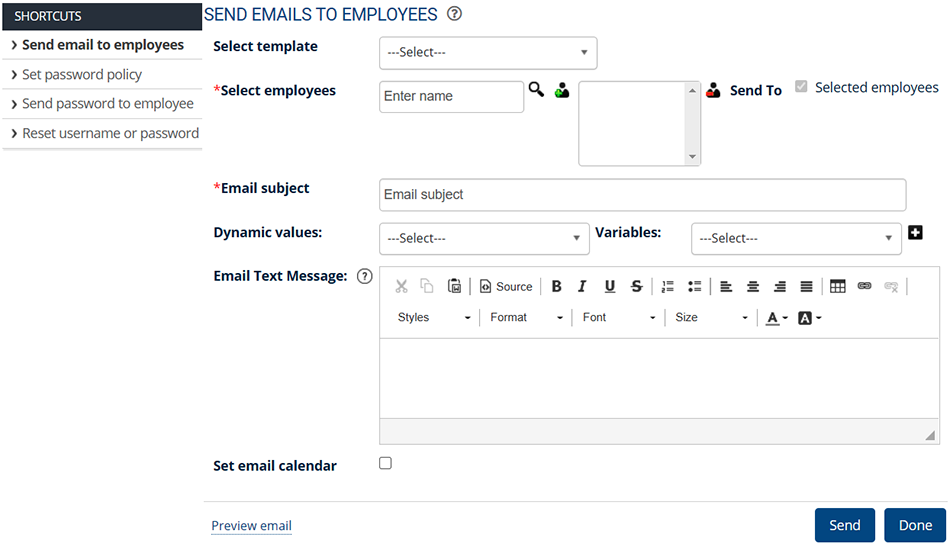
Figure 4
- From the Select template dropdown, you can either select an existing template or choose Blank template to write the message yourself.
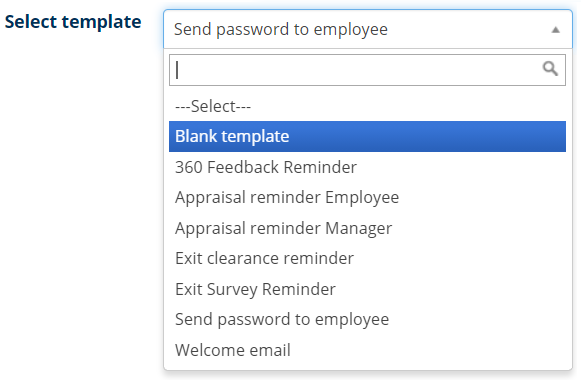
Figure 5
- Select all the employees to whom you want to send the message. Type employee name in the search box, select the name from the dropdown and click on the Plus sign to shift the employee in the selected employees list. You can also click on Advanced search/Find icon to find specific employees. View stepwise instructions to search employees using Advanced search.
- Input the subject line of the email in the Email subject textbox.
- Fill in the message details if the Blank letter template is selected.
- Select the checkbox corresponding to the Set email calendar field to specify a specific timeline for this task.
- Mention the Start and End time in the calendar, as shown in Figure 6.

Figure 6
- Click on the Preview email link to view the actual format in which employees will receive this email/ letter. If the preview email is fine, click Close. Else make necessary changes in the template.
- Click the Send button to share the message with all employees. The email is instantly sent to the selected employees.
Click on each of these links to know more about them:
- Setup Password Policy
- Send Password to Employees
- Forget Password
- Reset Password
- Navigation in Empxtrack
- Multiple Upgrade Options in Empxtrack
- Setup Global Groups
- Setup Access Controls
- Manage Workflows
- Setup Skills and Competencies
- Setup Company Information
- Time Settings
- Upload Employee Data
- Upload Reporting Relationship Data
- Setup HR Admin
- Setup Roles
- Masquerade as another employee
- File Validation Utility
- Open CSV File
- Save CSV File
- Advanced Search


