This help page displays step by step instructions to manage timesheet timeperiods functionality that allows easy management of time periods for the timesheets. HR can create weekly, monthly, and fortnightly timeperiods as per requirements.
To manage timesheet timeperiods, you need to follow the steps mentioned below:
- Log into the system as an HR Manager/ HR Admin.
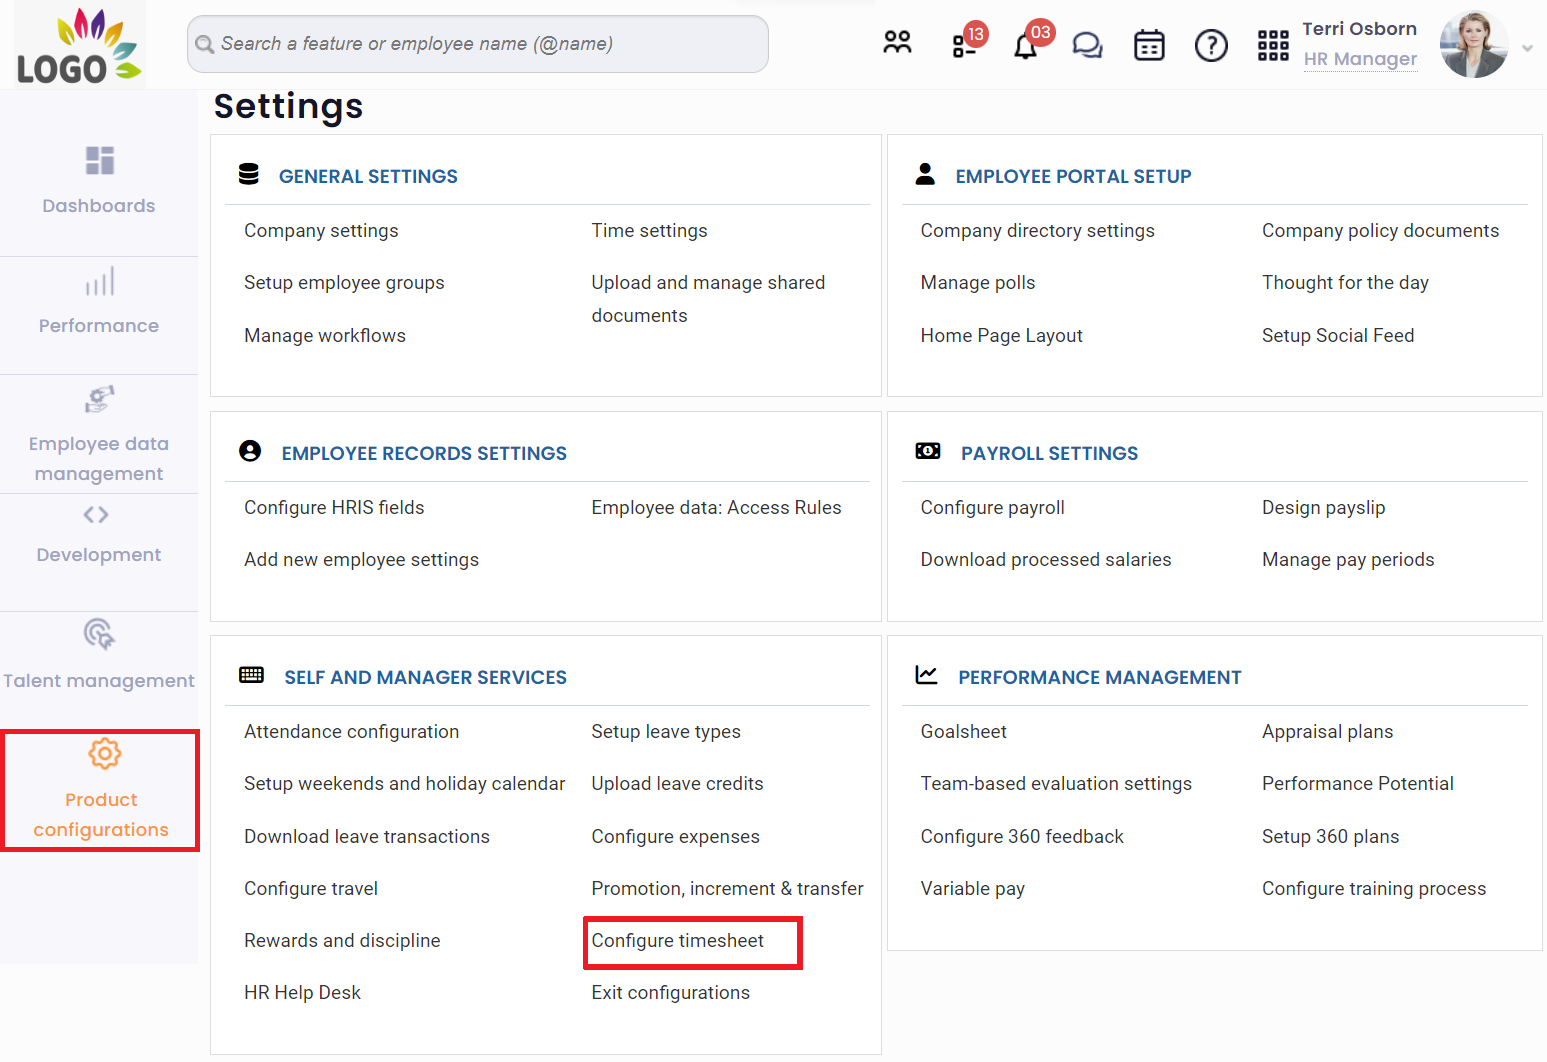
- On the Dashboards homepage, click on the Product configurations tab and go to Self and Manager Services. Click Configure Timesheet as shown in Figure 1.

Figure 1
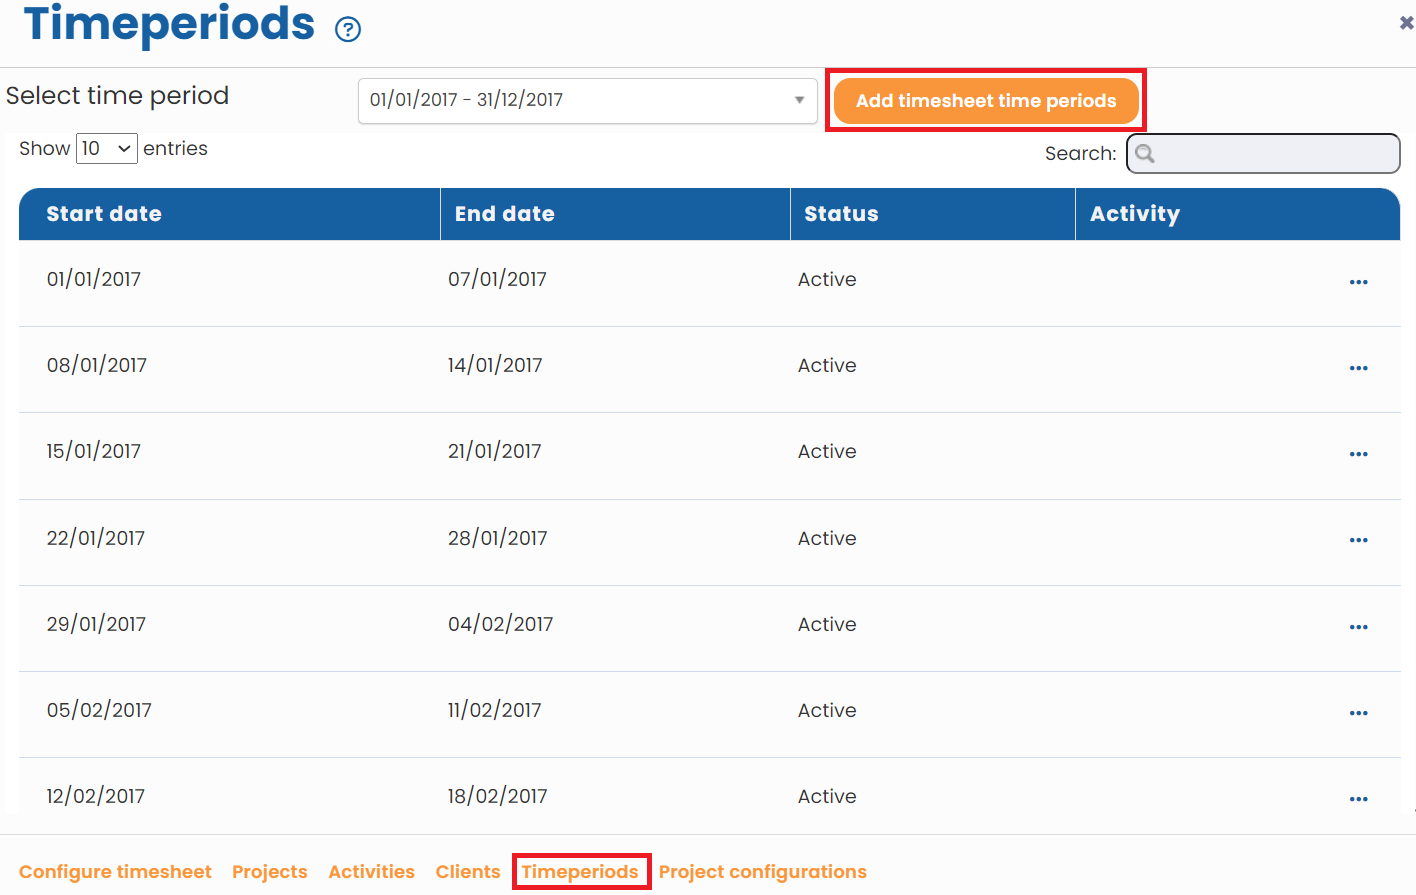
The Configure timesheet page appears. Click Timeperiods given at the bottom of the page. Now you can manually generate time periods for timesheet. Based on the configuration options, select the appropriate time period and click on Add timesheet time periods.
- Click Add TimeSheet Time Periods link to add a time period.

Figure 2
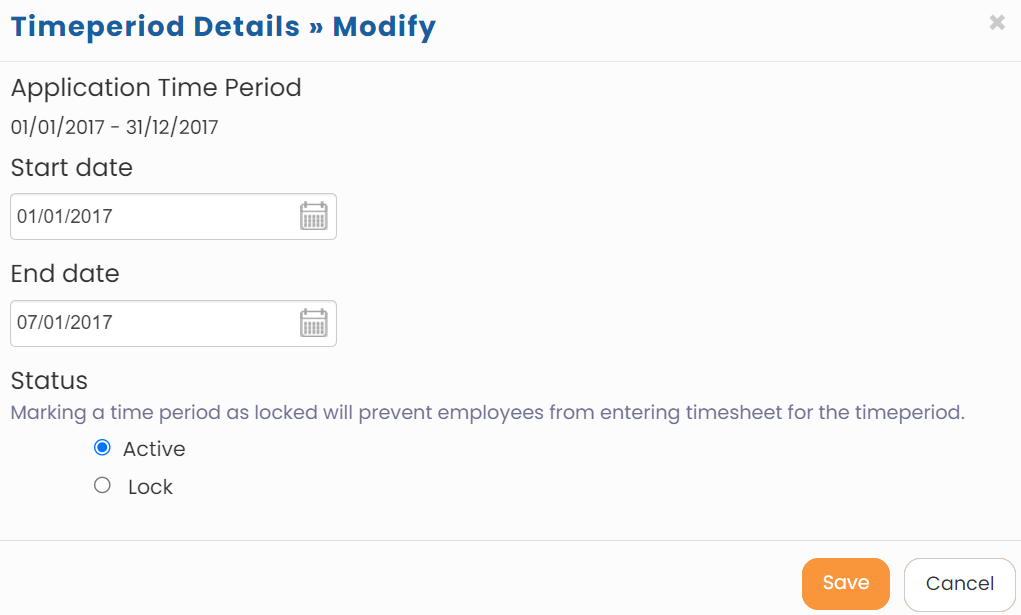
- Click any row or click modify icon in the preferred row. The Timeperiod details >> Modify page appears, as shown in Figure 3.
- Select the start date and end date of the time period from the Start Date and End Date calendar controls.
- Select the status of the time period from Status field. The below image displays the options that are available:
- Active: Select this option to allow timesheet entries for the time period.
- Lock: Select this option to stop users from entering timesheet entries for this time period.

Figure 3
- Click Save to save the time period that you have created. The time period is successfully created and a message suggesting the same appears on the screen.
Learn more about Empxtrack Employee Time Tracking
Click on each of these links to know more about them and understand the functionality in detail:


