Empxtrack allows upload of reporting relationship data that defines company hierarchy and setup approval workflows.
Note: The steps mentioned below are of Empxtrack Enterprise product.
To upload reporting relationship data, you need to:
- Log into the system as an HR manager/ HR admin.
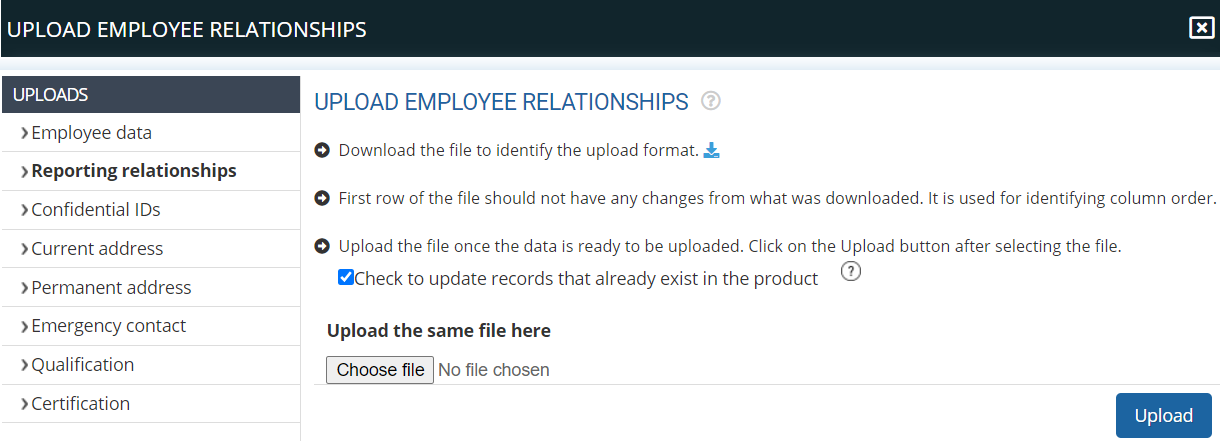
- On the Homepage, click on the Product configurations tab. In the Uploads section, click the Reporting Relationships link. The Upload Employee Relationships page appears as shown in Figure 1.

Figure 1
- Click
icon to download the CSV file that contains the format of the data to be entered.
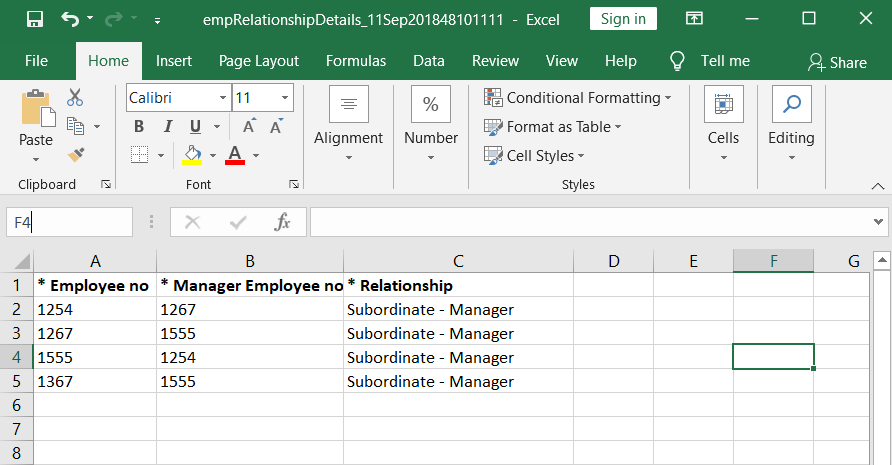
- You can now now open the file in MS Excel as shown in Figure 2. To know how to open the file in MS Excel, click Open CSV file. First row of the file should not be changed in the downloaded file as it helps to identify the sequence of columns.
- Save the file on your system and fill in the employee data without changing the columns.

Figure 2
- Select Check to update records that already exist in the product checkbox if you want to update data in case it already exists. If unchecked, the existing data will be ignored.
- Once the data is ready to upload, click Browse button to attach the file and then click Upload button.
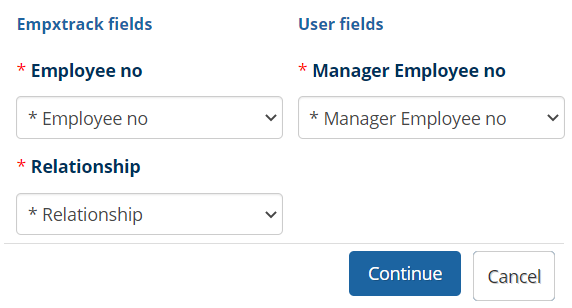
- A dialog box Fields Selection Mapping appears where you can cross check and match that the selected field in the dropdown is the same as the field name. This step is important to map the Empxtrack fields to the field headers in the user file, and this helps in error-free data upload. If the selected field does not match, click on the dropdown and select the required option.

Figure 3
Note: In case you are using the same file which was downloaded, all fields would match automatically.
- Click on the Continue button and then Confirm the employee data post verification. Employee relationship data is successfully uploaded in the system.Remember, this process is irreversible. Once the data is updated, you cannot reverse the changes.
Learn more about Empxtrack HRIS
Click on each of these links to know more about them:


