This help page demonstrates step-wise instructions on how an HR can download leave transactions for one or more employees.
Follow the steps:
- Login to the system as an HR manager/ HR admin.
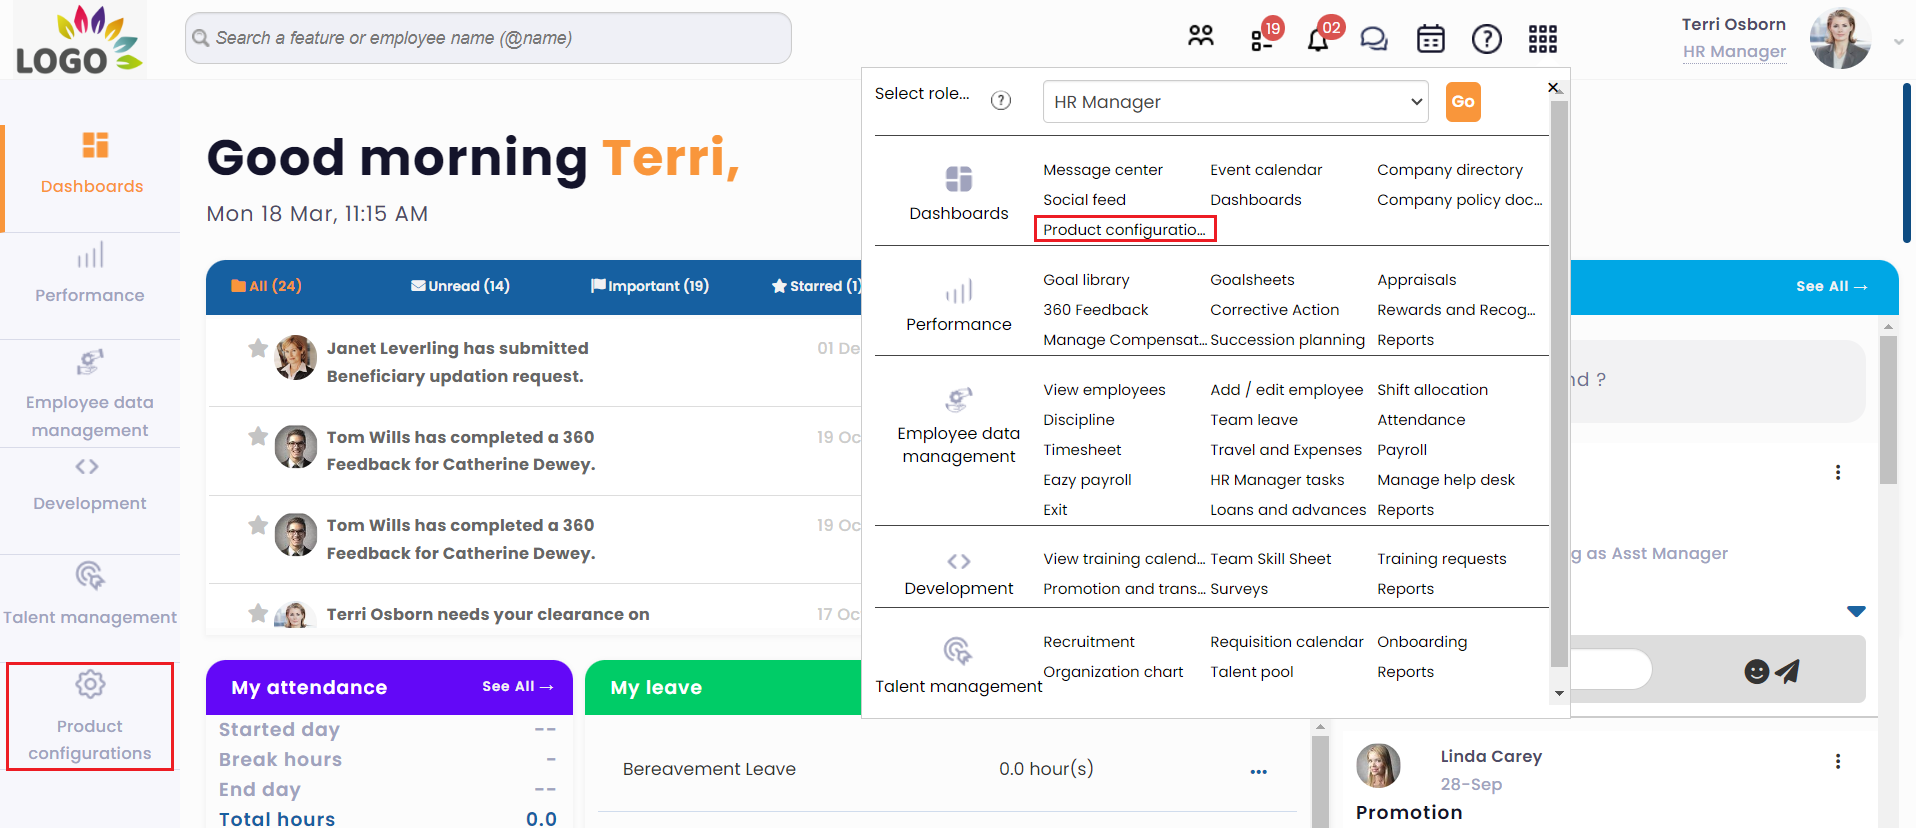
- On the Dashboards homepage, click the Product configurations tab. Alternatively, go to Role and Features menu and click Product configurations.
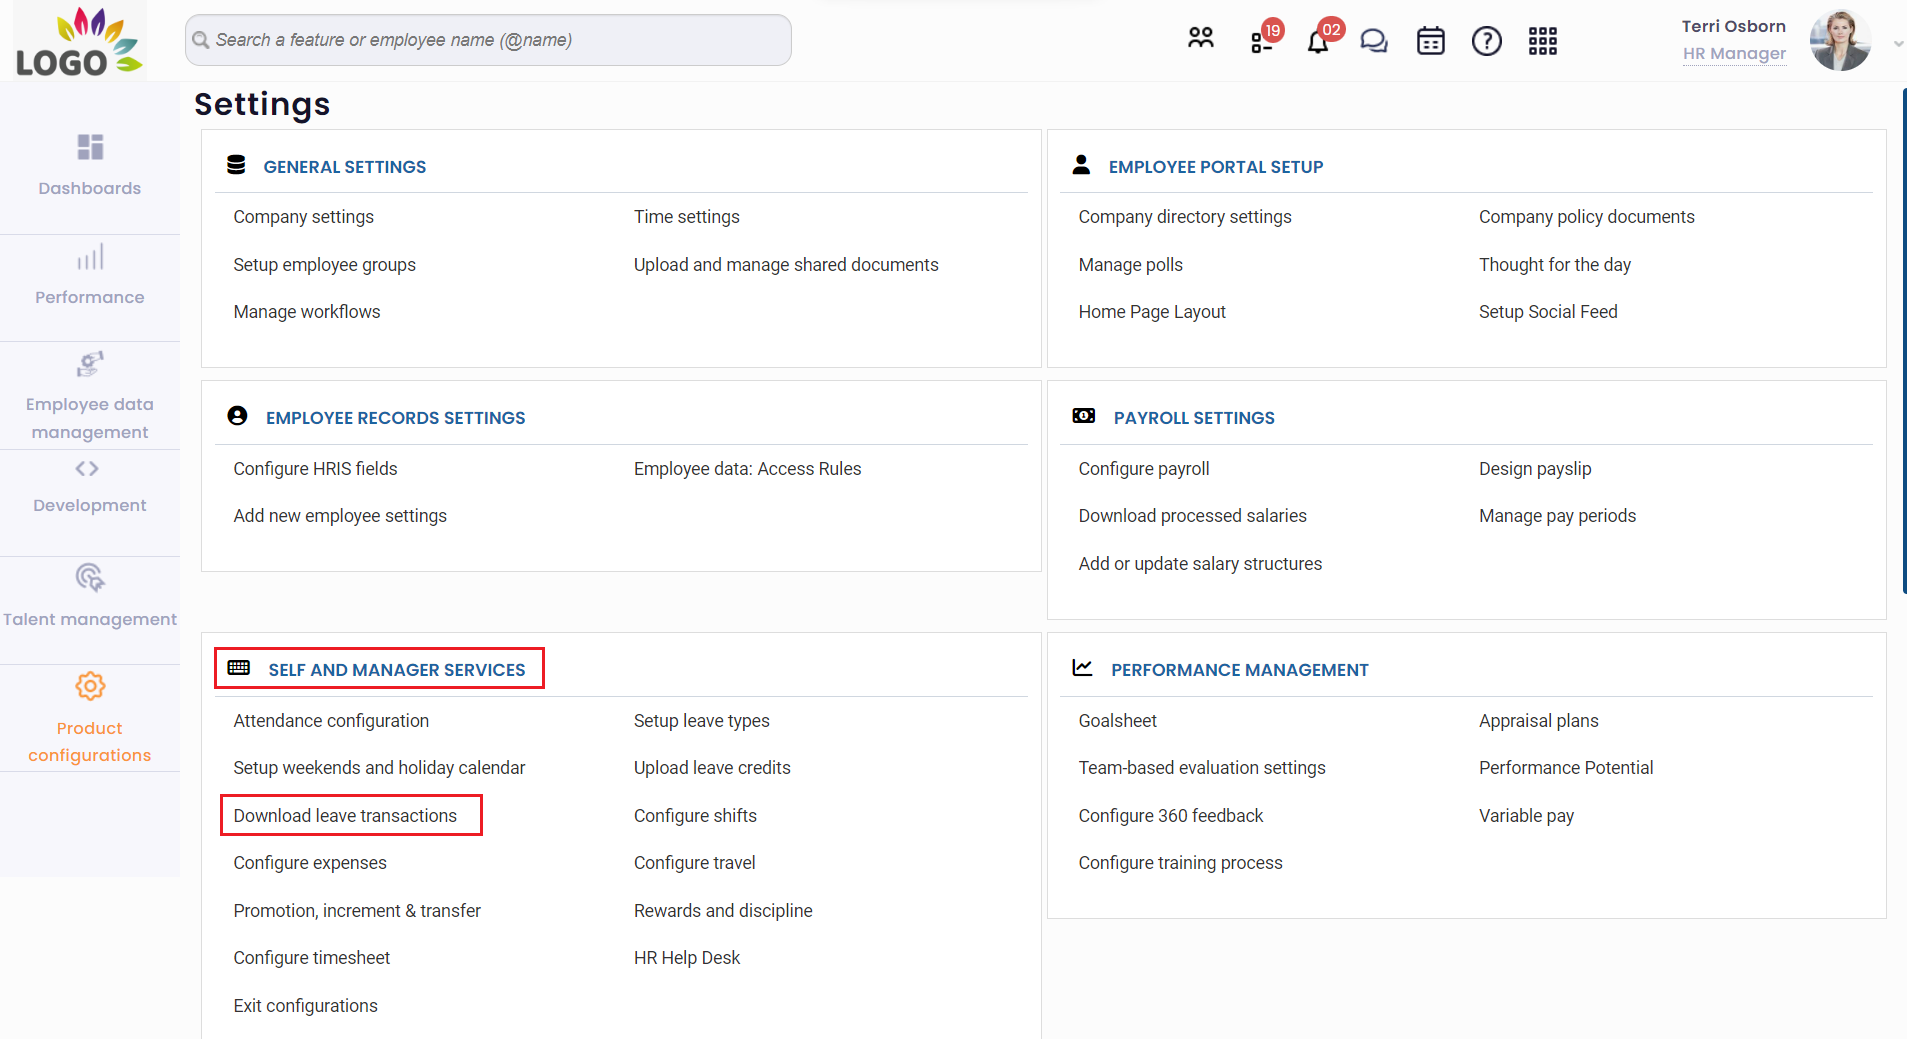
- On the Settings page, click Download leave transactions under Self and manager services. The required page appears on the screen.
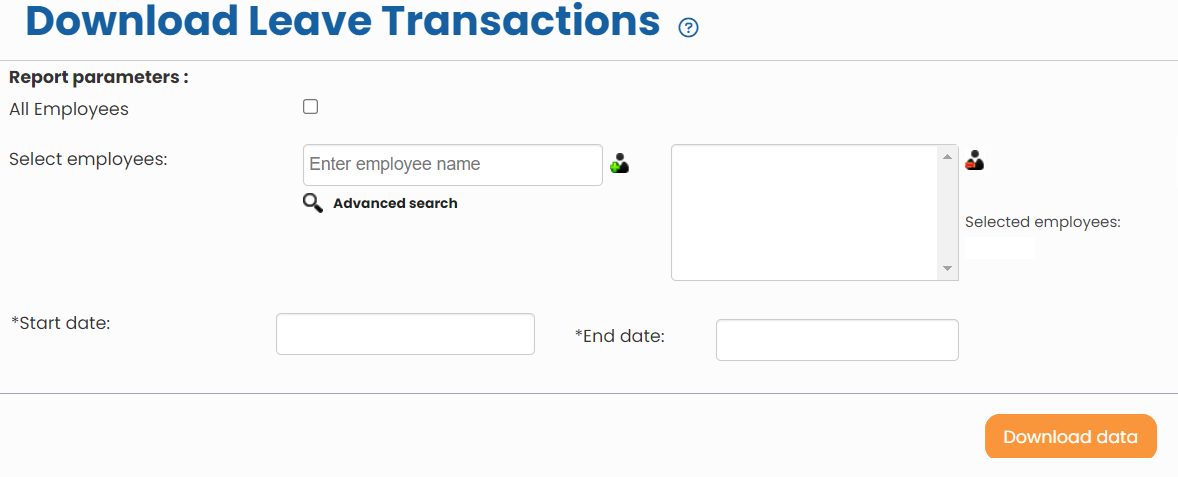
- Either select All employees checkbox to select all employees or specify name of the employees for whom you want to download leave transactions in the Select employee textbox. Click Plus (+) sign to add them to the list of selected employees. To select employees based on a criteria, use Advanced Search.
- Specify the Start date and End date.
- Click on Download data to download a CSV file with all leave transactions. The file will be saved in your download folder.

Figure 1

Figure 2

Figure 3
Learn more about Empxtrack Leave Management
Click on each of these links to know more about them:
- Setup of Leave Types
- Configure Leave Rules
- Configure Time Settings
- Configure Leave Credit Rules
- Setup of Weekends and Holiday Calendar
- Upload Leave Credits
- Credit Leave to Employees
- View Pending / Rejected / Past Leave Records
- View Leave Transactions
- View Leave Policy
- Leave Cancellation
- Apply for Leave
- Approve Leave as Manager
- Manager Dashboard for Leave
- Masquerade as another Employee


