Empxtrack allows mass upload of employee leave balance using CSV file. This upload leave credit functionality is useful when you have just started using the system and want to upload the current leave data of all the employees.
To upload leave balances to employees, you need to:
- Log into the system as HR manager/ HR admin.
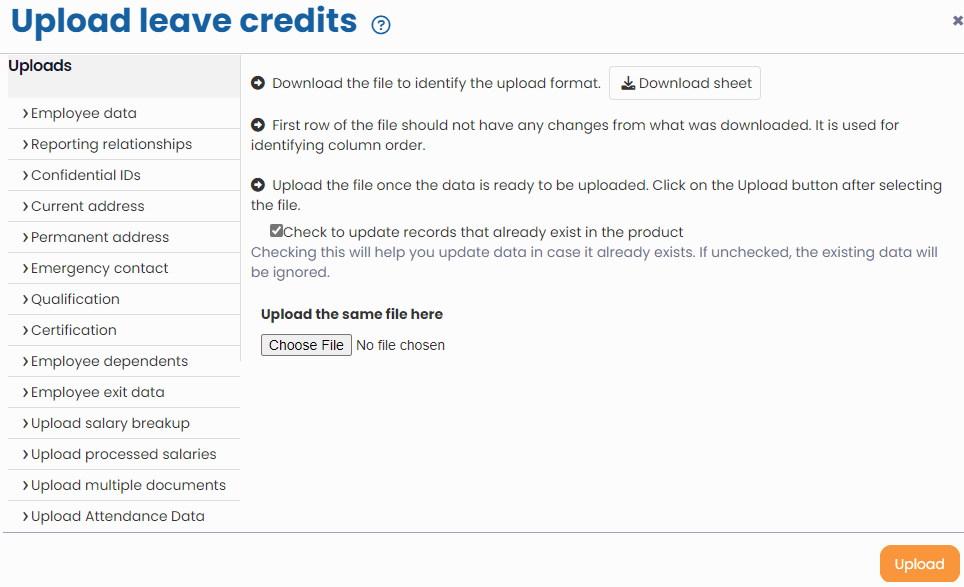
- On the Dashboards homepage, click on the Product configurations. Under Self and manager services, click on the Upload Leave credits. The page appears as shown in Figure 1.
- Click Download sheet from the step one mentioned as Download the file to identify upload format.

Figure 1
Open the downloaded file with Microsoft excel. You can now open the file in MS Excel. To know how to open the file in MS Excel, click Open .CSV File.
- Once the .csv file is downloaded, you have the format in which the data needs to be put. You can now put the leave data in the file.

Figure 2
- Make sure to mention the dates in the specified format (dd/mm/yyyy). If dates do not appear in desired format, then right-click the date cell(s) in which you are providing dates and then select the correct date format so that date appears in <dd/mm/yyyy> format.
Upload the CSV File
Once you have added the data of all the employees in the csv file, you can upload the file to Empxtrack system.
To upload the file with leave credits, you need to:
- Click choose file to browse the .CSV file where you have added the data Upload the same file here section.
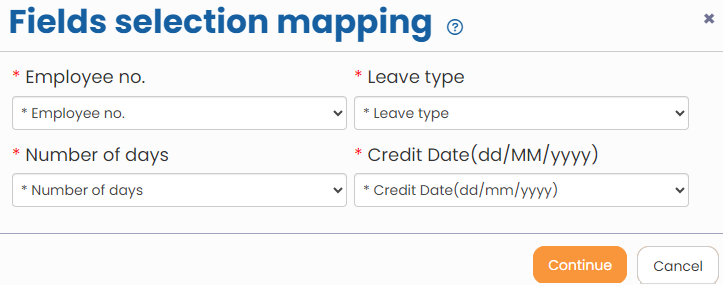
- Click Upload. The Fields selection mapping page appears as shown in Figure 3.

Figure 3
The data that you have uploaded through CSV file appears for you to check and confirm upload.
- Click Continue. A new page appears where you can verify the uploaded data.
- Click Confirm. The upload leave credits status for each record appears on the screen.
Learn more about Empxtrack Leave Management
Click on each of these links to know more about them:
- Setup of Leave Types
- Configure Leave Rules
- Configure Time Settings
- Configure Leave Credit Rules
- Setup of Weekends and Holiday Calendar
- Credit Leave to Employees
- Download Leave Balance
- View Pending / Rejected / Past Leave Records
- View Leave Transactions
- View Leave Policy
- Leave Cancellation
- Apply for Leave
- Approve Leave as Manager
- Manager Dashboard for Leave
- Masquerade as another Employee


