This help page demonstrates step by step instructions to setup Empxtrack Free Payroll and HR software. Post enrolment, you will receive an application setup link and verification code on your registered email id. Login to the application to complete initial setup.
Watch the video for step by step instructions to process payroll for an employee
Setup Company Logo

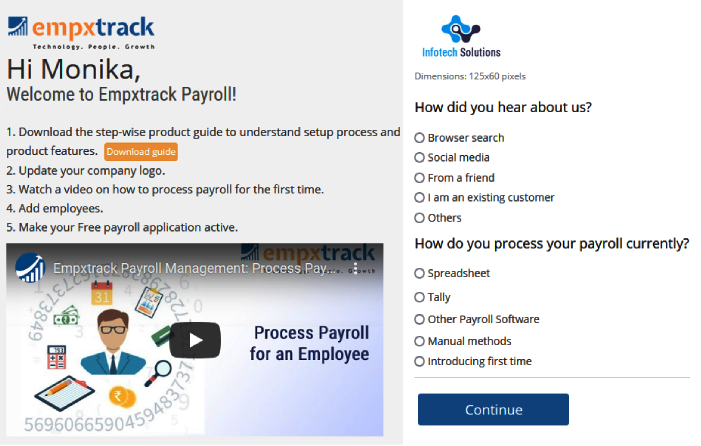
Figure 1
Upload the company logo as shown in Figure 1. Hover the cursor on the logo to click the Change company logoicon and browse the file from your system. Select an option for the questions and click Continue.
Note: The default size supported for the logo is 125 x 60 pixels and gif, jpeg and png files formats are supported. The maximum size allowed for the company logo is 1024 kb.
Setup Basic Settings

Figure 2
Change your default password and set a new password and remember it for future reference. The new password would be required when you login to the application next time.
Select the financial period from the dropdown and specify start date of your first pay period using calendar control.
Select the dates when you start payroll processing and finalize the payroll. Click Continue.
Add Employees in Empxtrack Free Payroll

Figure 3
In this section, you can add employee data in two ways – Upload mass employee data in one go (using spreadsheet) or Add employees one-by-one.
(A) Upload employee data in one go. Click the Upload employees using spreadsheet link.

Figure 4
The Upload employee data page appears as shown in Figure 4. You can download the file to identify the format in which employee data needs to be uploaded. To know how to open the file in MS Excel, click Open CSV file. Fill the downloaded file with employee data and upload it in the application to map the fields.
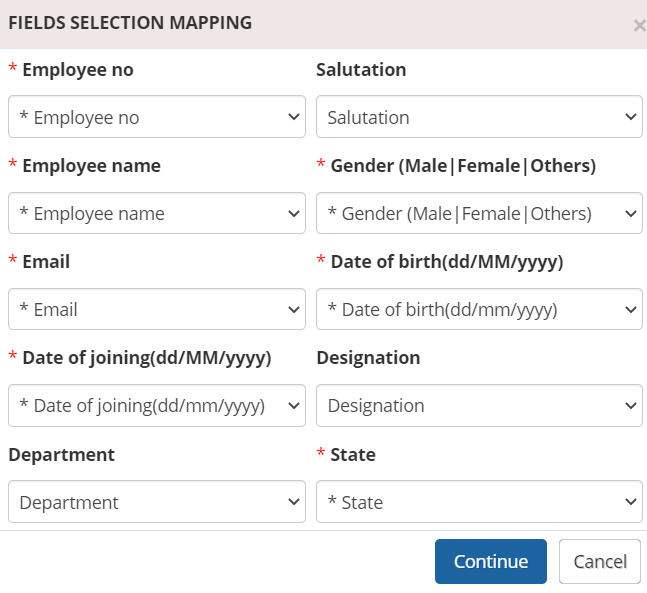
Map fields in the Fields Selection Mapping page by clicking Continue button. Make sure all the Empxtrack and User fields have the same format to avoid data discrepancy.

Figure 5
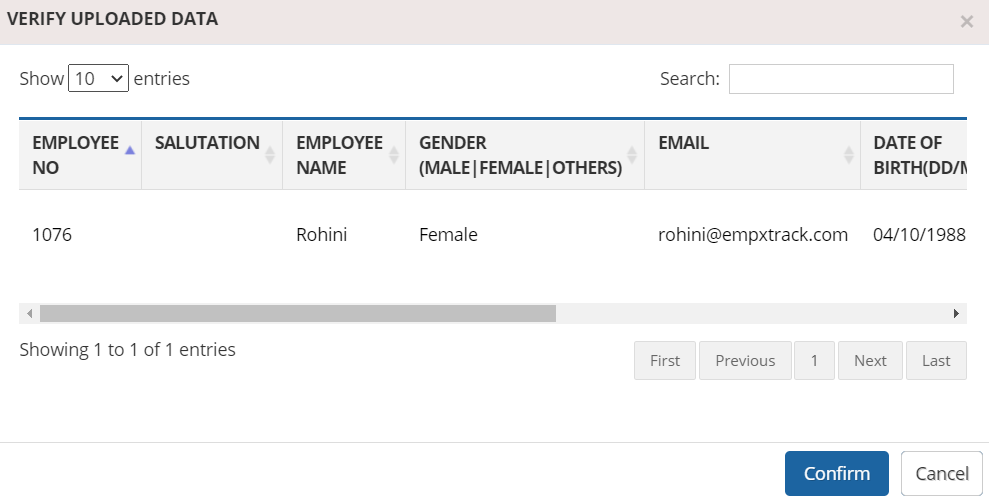
Click the Confirm button after verifying the employee data as shown in Figure 6.

Figure 6
The employee data is uploaded successfully in the application. A confirmation message appears on the screen to indicate successful upload of employee data.
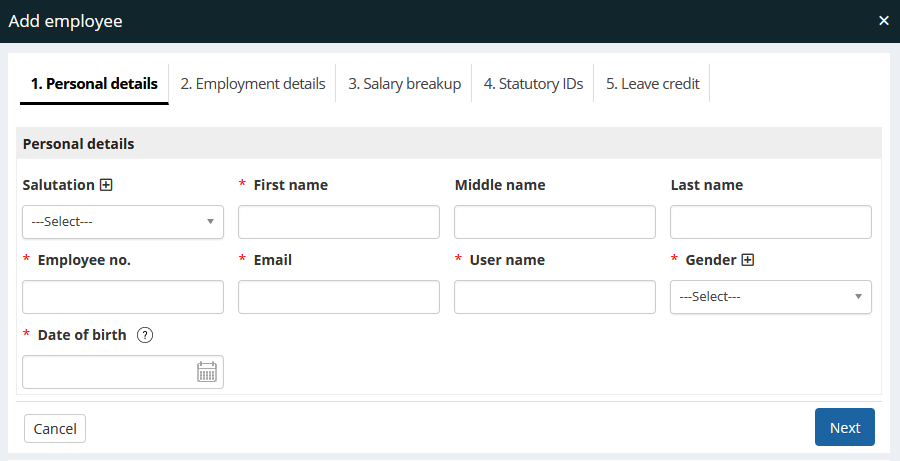
(B) Add a new employee one-by-one by clicking Add an employee button.
Input all the personal and employment details of an employee. Remember to fill in the fields marked with asterisk (*).
You can click on the “+” sign to add new fields for Masters such as Department, Designations etc.
Once the employee record is saved, HR or employee can fill the remaining information in the application. Click Continue.

Figure 7
Select More Products Other Than Empxtrack Free Payroll
Along with payroll, you also get employee portal, leave and attendance.

Figure 8
Additionally, you get an option to select more products of your choice. Select the checkbox, add more products for free and build your own HR software.
Your application setup is now complete. You have successfully setup Empxtrack Free Payroll and is ready to use Empxtrack Free Payroll and HR software.
Watch the video for step by step instructions to process payroll for an employee
Upgrade to a Paid Edition

Figure 9
Post completion of setup mode, you can view application Homepage. Click on Upgrade button as shown in Figure 9. You can upgrade the application to buy additional employee licenses or start using additional products for free.
Once you setup the application, you may like to configure the payroll settings to meet your company requirements. Watch a short video on how easily you can configure global payroll settings in Empxtrack
Learn more about Empxtrack Payroll Software
To learn how to manage and process payroll using Empxtrack, click on these links:
Click on other links to know more about them
- Payroll Configurations
- Setup Payroll Variables
- Setup Variables for Payroll Reports
- Setup Salary Structures
- Add Salary Heads to a Salary Structure
- Assign a Salary Structure to Employees
- Upload Salary Structure
- Upload Past Salaries for Employee
- Download Employee Salaries
- Setup Investment Declaration
- Configure Company Settings for Payroll
- Design Pay Slip
- Setup Claim Variables


