Employees create an expense sheet to claim the expenses that they have made for the company. The request once created needs to be approved by the manager as per the workflow configured by HR manager.
To create an expense sheet, you need to:
- Log in to the system as an Employee.
- On the Dashboards homepage, go to Role and features menu
 icon and click Travel and expenses as shown in Figure 1. You can also click Self services and scroll down to Travel section.
Alternatively, you can type “expense request” in the Search bar and select the option as My expenses.
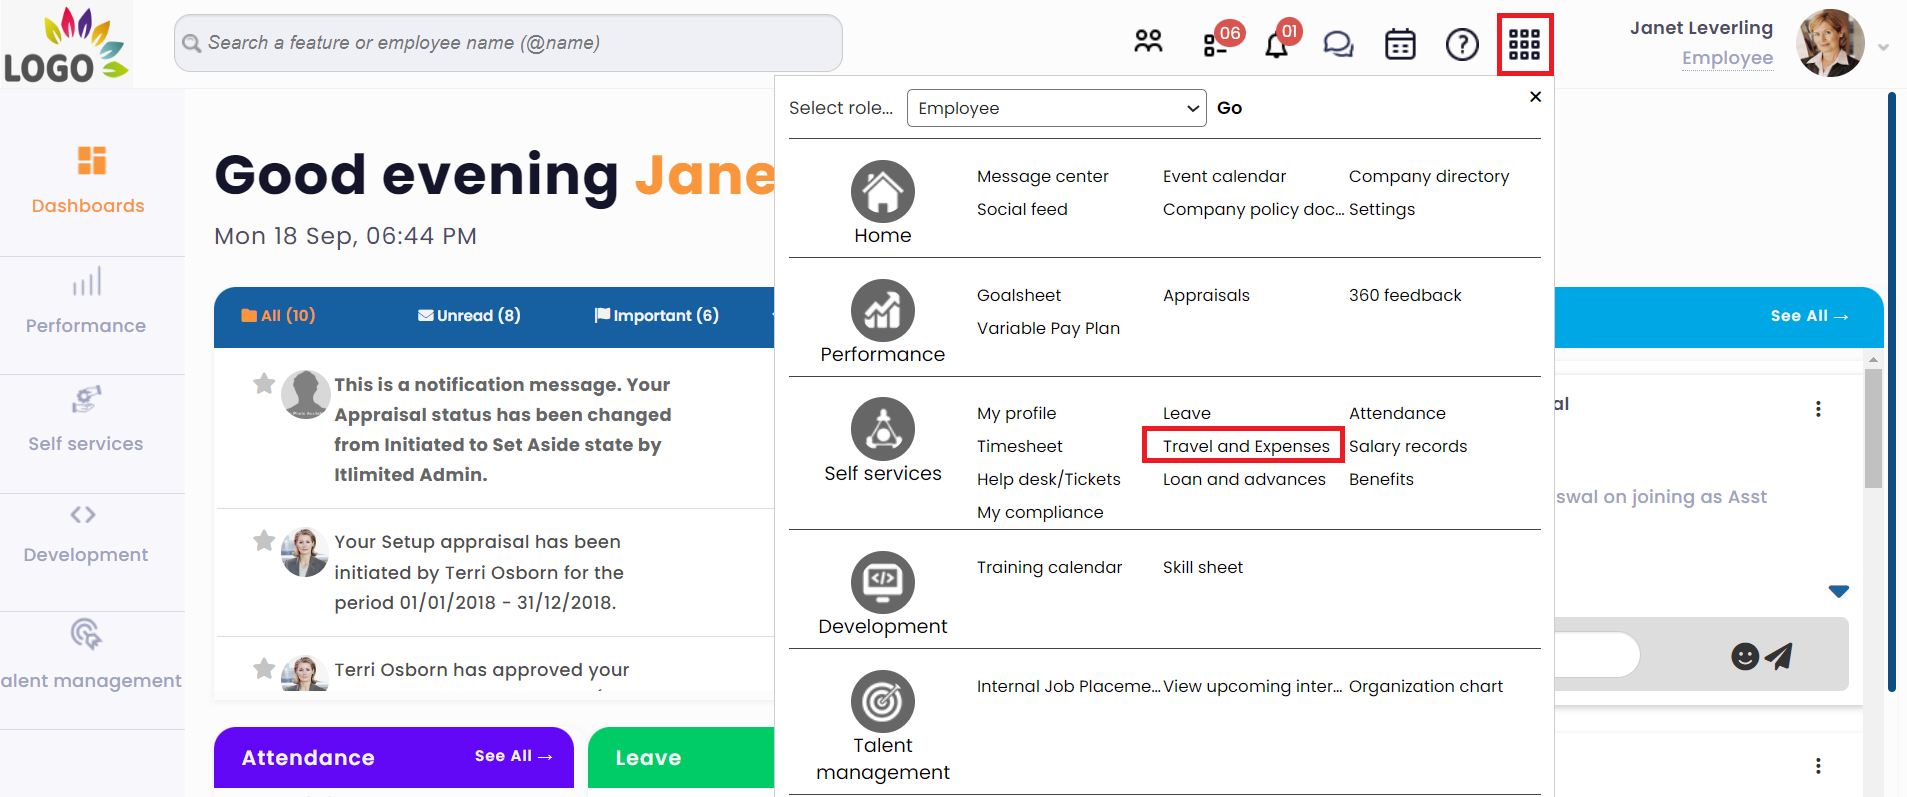
Figure 1
- The Travel and expenses page appears as shown in Figure 2. Click Create expense sheet.
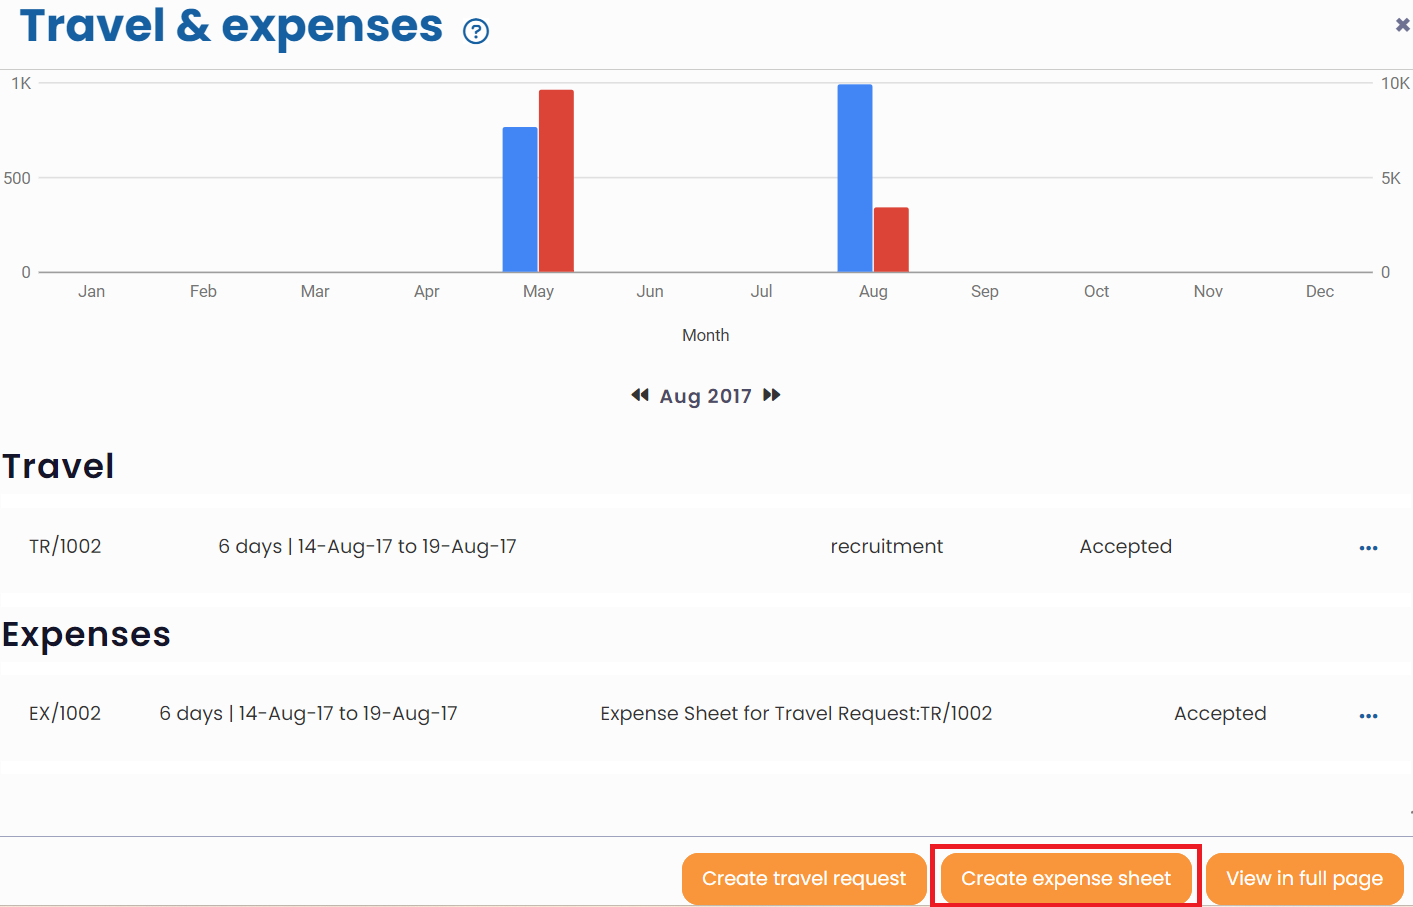
Figure 2
- Select the expense type from Expense Type field.
If you select Travel Related Expenses from the Expense Type field, then you will be allowed to tag an approved travel request with this expense request. You may need to tag a travel request with your travel expenses, in case you have spent more than the travel expenses.
For example, consider you have an approved travel request for the ticket expenses you made to visit the client place. However, after getting down from train/ airplane, you had to make some more travel expenses on taxi that you hired to reach the client’s office.
In such a scenario, you can create an expense sheet (travel type) for taxi expenses and tag travel request with it to suggest that the expenses were made in the same trip.
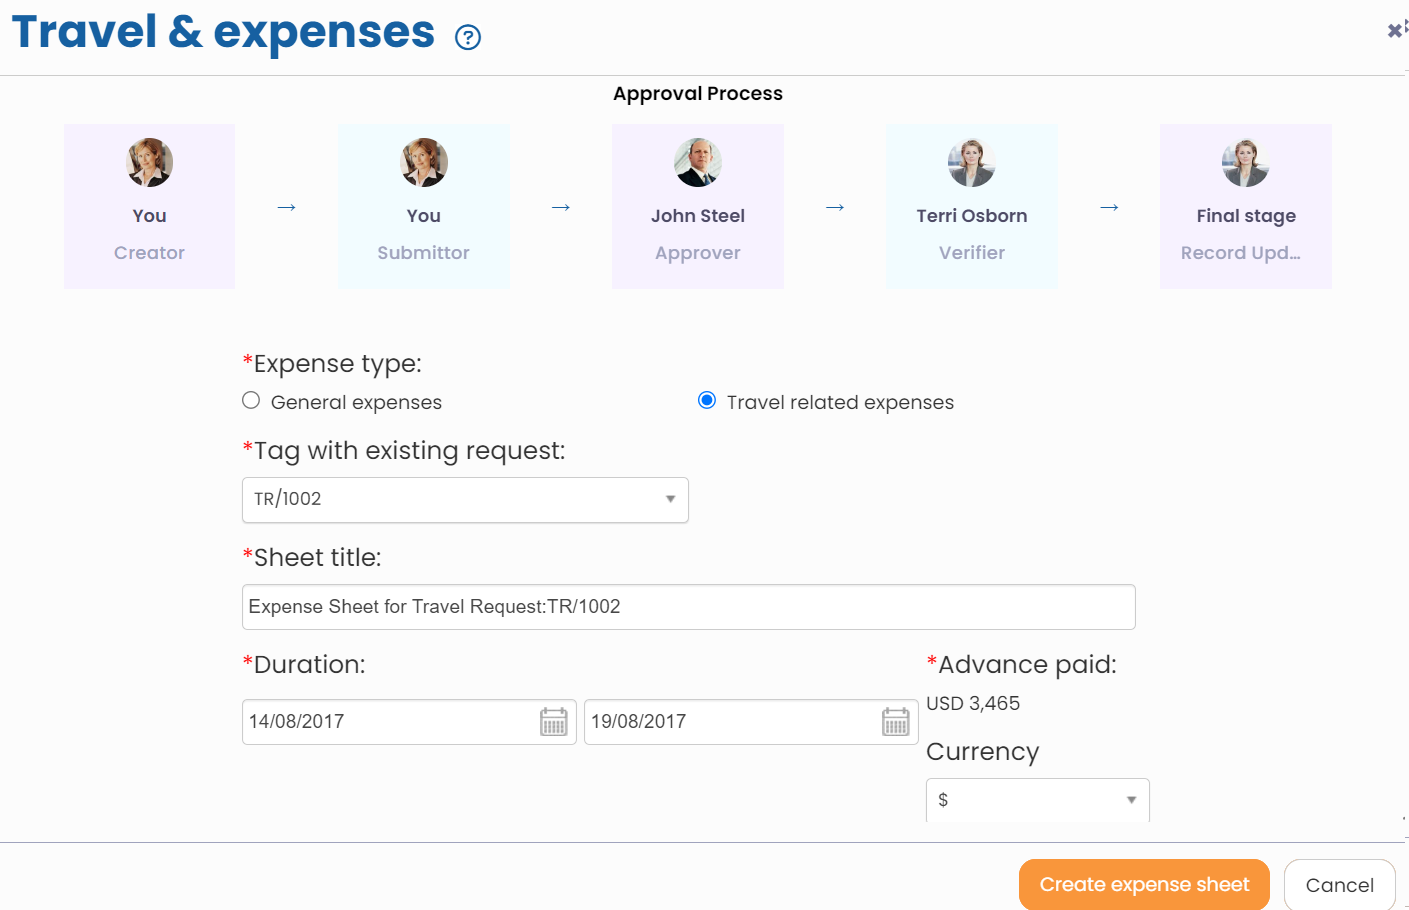
Figure 3
5. Select the approved travel request from the Tag With Existing Request dropdown that appears on selecting the Travel Related Expenses from the Expense Type field.
6. The Sheet title appears automatically when you select an existing request from Tag With Existing Request dropdown.
7. Provide the duration when the expenditure was made in the Duration calendar controls.
The Advance Paid field displays the advance amount, if any advance is paid to you (in case it is travel request). Advance payments can be made to employees to facilitate their travel and the amount paid are deducted from the actual expenses made by the employees at the time of final approval of expenses.
8. Click Create Expense Sheet button. The Expense Claims window appears as shown in Figure 4.
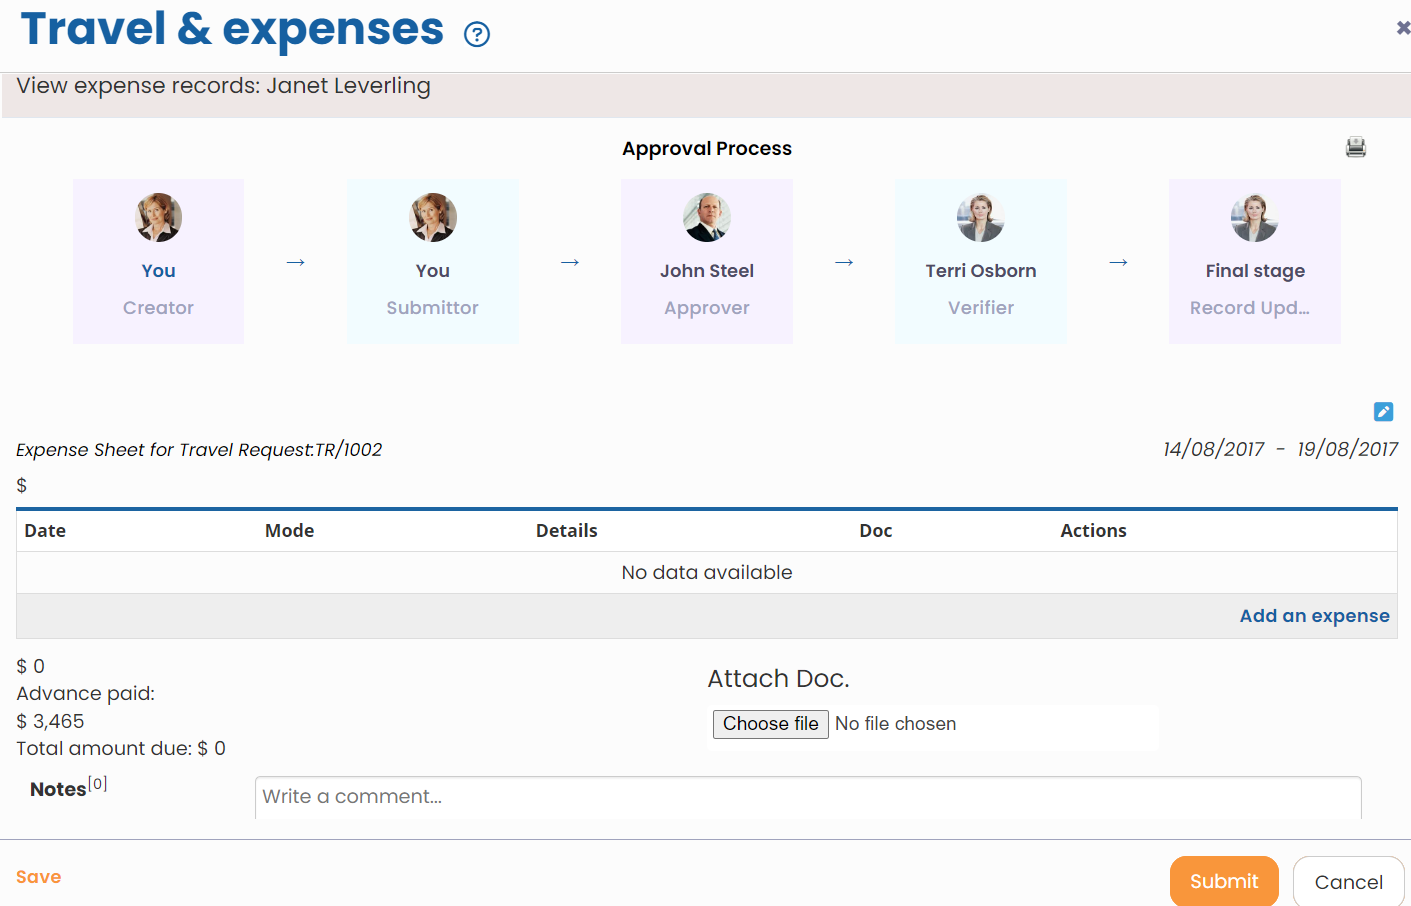
Figure 4
The window displays expense details for the request and allows you to add expense legs to the expense sheet. The expense legs are the expenses made in the same period as defined in the expense sheet. The window also displays the approval workflow of the expense request with the name of the approvers at each stage.
9. Click Add an expense link to add an expense leg to the request. The Add an expense window displays the expense sheet details appear, as shown in Figure 5.
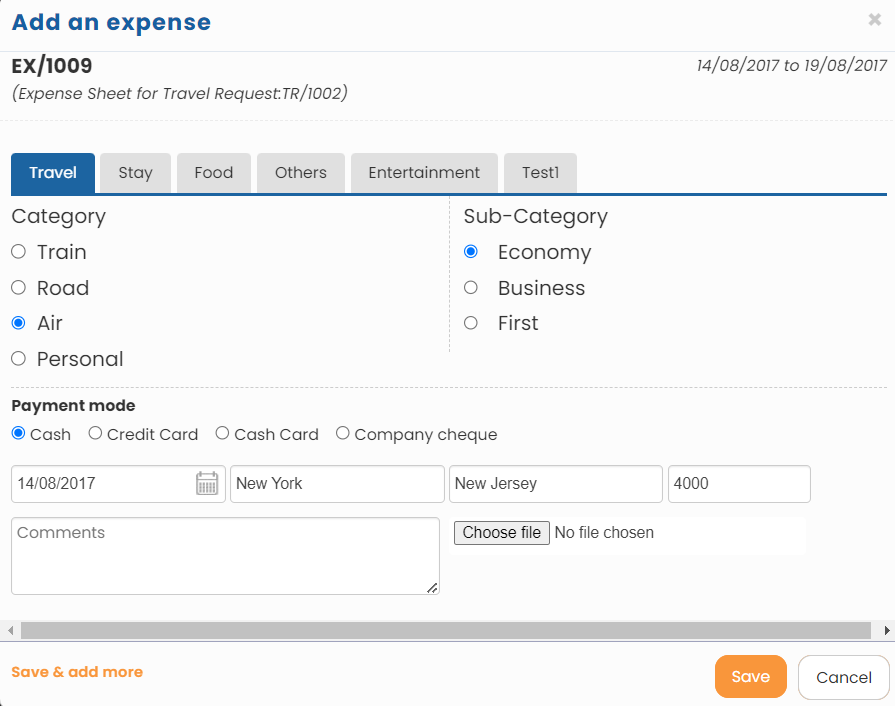
Figure 5
10. Select Mode of Travel, Sub-category and Payment Mode from their respective fields if you select Travel type. Select the appropriate Hotel Type and Payment Mode from their respective fields if you select Stay type and select a Meal Type and Payment Mode from their respective fields if you select Food type option.
11. Fill the date of expense in the Date field using the calendar controls, and then specify the source and destination of your travel in the From and To fields.
12. Specify the amount you spent on the selected expense type in the Amount field.
13. Add comments if you wish to put any notes and upload the related expense file/ bills from the Choose file button.
14. Click Save to save the leg that you have added or click Save And Add More to save this leg and add more legs to the expense sheet. The expense leg that you have added can be see on Expense Claims page, as shown in Figure 6.
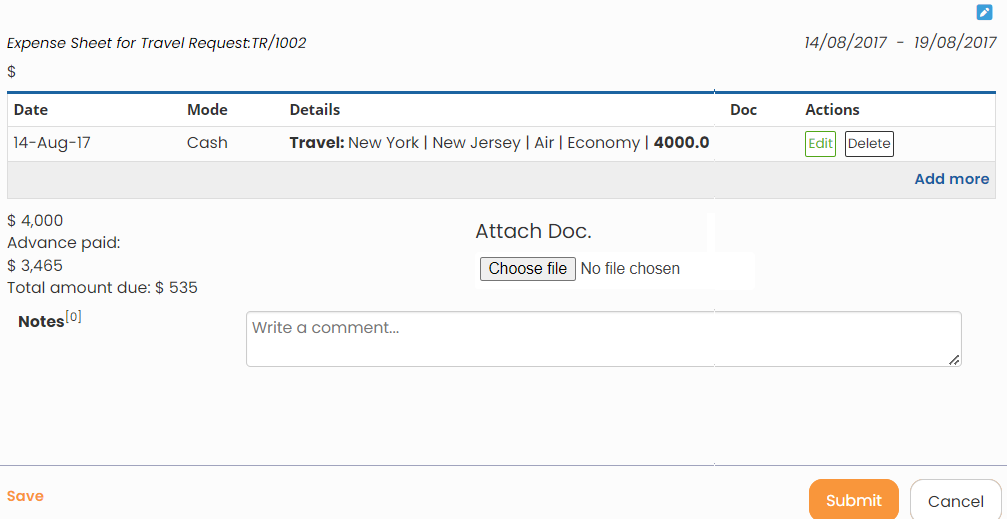
Figure 6
15. Select the document that you want to attach as a proof of expense from the Attach doc field by clicking Choose file button.
16. Click Add Note link at the end of the window to add a note about the expense.
17. Click Submit. The expense sheet is submitted to your manager as per the workflow configuration.
The expense sheet is successfully created and a message suggesting the same appears.
Learn more about Empxtrack Travel and ExpenseClick on each of the following links to know more about them:


